Introduction
Asteroid astrometry can be thought of as belonging to one of three
categories: 1) bright asteroid with few background stars, 2) faint
asteroid with few background stars, and 3) faint asteroid with too many
background stars. The best procedure for processing images will differ
for these three categories. For the first category it is sufficient to
use PinPoint to perform the entire analysis procedure. For the second
category it is adequate to merely perform a track/stack (no star
subtraction). It's the challenge of the third category that this web
page is meant to address.
When dealing with faint asteroids in a crowded star field it may be
worth the effort to perform a labor-intensive analysis that greatly
fades the star field while retaining the asteroid's brightness. The
procedure on this web page is recommended for only those people who
love image analysis. The payoffs are not dramatic enough for the casual
user. For example, when an initial set of 12 images is used the
final image affords a limiting magnitude improvement of only 0.6
magnitude
(SNR greater by 1.7) compared to a single image. This may sound like a
losing endeavor, and it would be if there were no background stars. But
since stars are always present there may be times when this procedure
is useful. I'll consider a case of 12 images taken 16 minutes apart of
a NEO (near Earth asteroid) field. (For a typical NEO, which moves
fast, it
would be better to take images spaced ~ 5 minutes apart.)
The loss of SNR is compensated by a 9 magnitude reduction in star
intensities while preserving the asteroid's brightness. Provided the
asteroid
passes close to only unsaturated stars this objective procedure
promises
to make use of the asteroid's "information" in each image, which makes
the procedure "objective." This
procedure is NOT recommended when the star field is uncrowded or when
the asteroids are bright enough to be seen in each image.
The present set of 12 images were made with a 32-inch
Ritchey-Chretien telescope owned and operated by my neighbor Dave Healy
(Junk BOnd Observatory, MPC Code 701). Each exposure was unfiltered and
3 minutes long, spaced 16 minutes apart (for fast-moving NEOs I
recommend as close a spacing as possible). The NEO has a predicted
V-mag = 21.6 and movement of 2.04 "arc/minute at pa = 252 degrees. The
images were calibrated using a dark frame at a quite different
temperature, which caused an abundance of pixel artifacts. The next two
figures show a single raw image and the final image based on the star
subtraction procedure using 12 images.
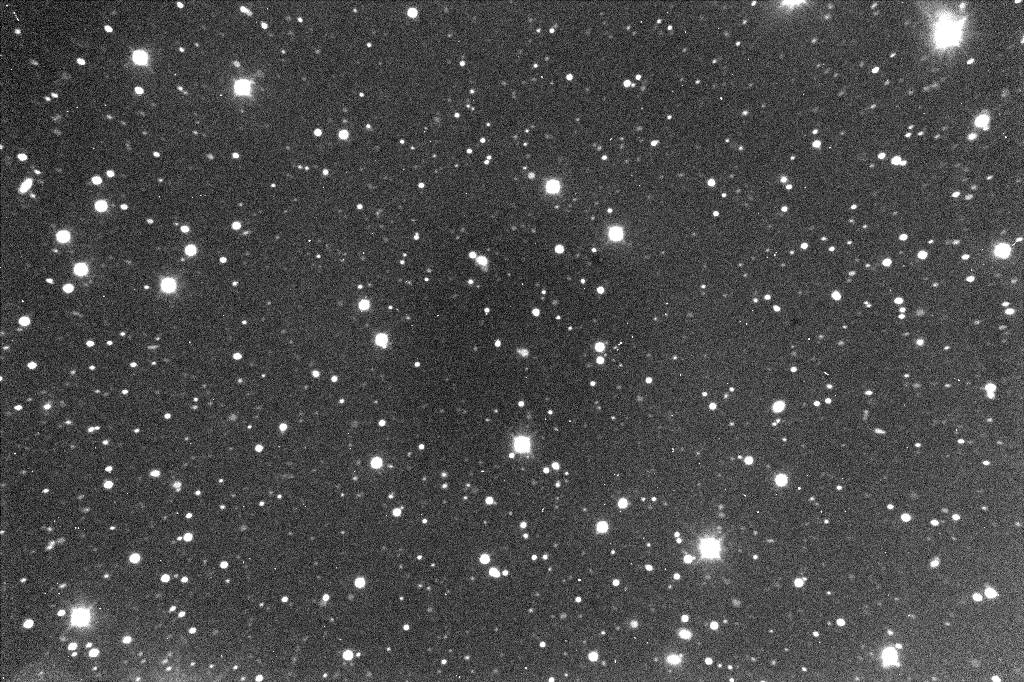
Figure 1. Raw image #1. FOV = 27 x 18 'arc. FWHM = 3.7 "arc. [Exposure 180 seconds, unfiltered, unguided, Junk BOnd Observatory, 2007.01.16 UT]
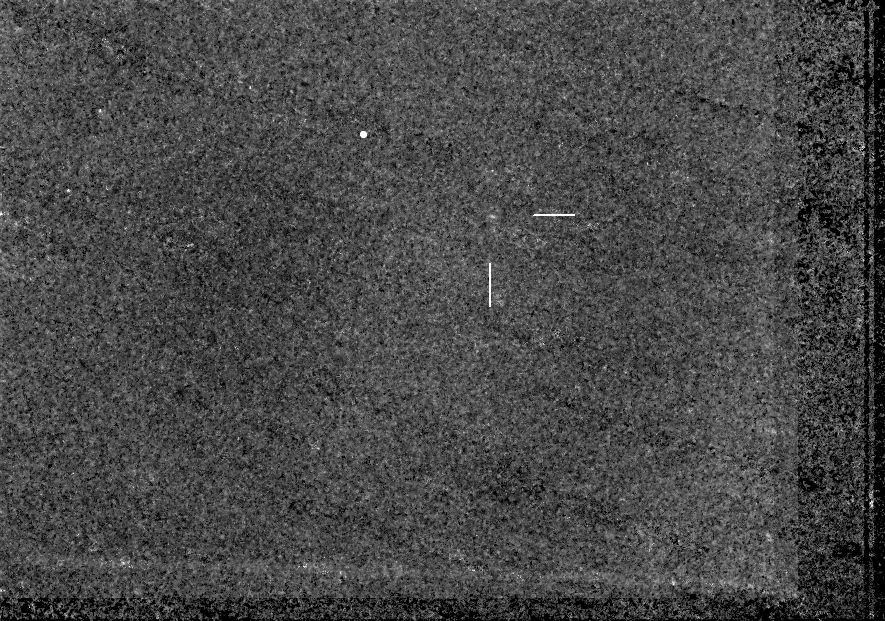
Figure 2. After star subtraction and median combining (using a reference dot that was pixel edited into each image at a location that moved at the asteroid's rate). The asteroid has SNR = 15 and CV = 21.0. The residual "noise" associated with star features has CV ~21. [Exposure 180 seconds, unfiltered, unguided, Junk BOnd Observatory, 2007.01.16 UT]
The star subtraction and asteroid track and stack procedure will now be described.
STAR-SUBTRACT AND ASTEROID TRACK/STACK PROCEDURE
2) Plate
solve the following 3 images: 1, 5, 9.
4) Note
times of all images. Hopefully they’re uniformly spaced with delta-t = constant.
6) Unload
all images; then load images 1, 2, 3 & 4. Star-align them (1 will retain
astrometry)
8) Make
table (or use Excel) to calculate time offsets for images 3, 4 & 5 with
respect to the first one. Using dt2, dt3 & dt4 (time offsets w.r.t. image
#1), calc dx,dy pixel offsets for the “asteroid offset dot” for all images (including
a starting offset of +20 pixels for the 1st image).
10) Read
FWHM of a specific star (it could be the “reference star”) for images 1d, 2d,
3d & 4d.
12) Run
the “align” tool and copy 1d to the process window, then copy the most similar ALLSTAR_??
image to the process window. Complete the align.
14)
Repeat above two step for images 2d, 3d & 4d. This will produce images
2dss, 3dss and 4dss.
16) As an
extra feature you can place a pixel edited symbol (such as an X) at a specific
RA/Dec location (near the UL corner). This might be useful when doing an
animation in which \you want the RA/Dec coordinates to be fixed to see if you can
see an asteroid moving).
18)
Finally, repeat steps 6 thru 16 for images 9, a, b & c. This will produce
C(9abc).
Comment:
If the asteroid is bright enough to be identified in each of images A, B &
C, then you can read its RA/Dec in each of those images & apply a time tag
correction to these readings. This will give a 3-epoch astrometry set, suitable
for MPC submission. It may be necessary to identify the asteroid in image ABC
before noticing that it is also present in A, B & C. To verify that an
asteroid candidate is probably true, view animations using first the “dot” for
alignment (positioning the cursor at the suggested asteroid’s location to see
if it’s present in all images) and second using the RA?Dec “X” symbol for
alignment to see the asteroid move while the (invisible) star field remains
fixed.
Related Links
____________________________________________________________________
This site opened: January 2, 2007. Last Update: February 12, 2007